Xposure brings in lot of features to help you showcase your work to the world in style. Here is a complete overview of all the goodies that you get with Xposure and a detailed guide of how to use those features.
How to set-up the Featured Images and Taglines for a page or post
Xposure offers you an elegant way of presenting your images to the visitors on your website. The featured image you add to the pages and posts will be presented as backstretch image in a big featured image area on each page / post. Additionally, Xposure introduces Custom Tagline feature which enables you to set a tagline for each post and page. The tagline could be a few words or a short sentence that describes your post or page. The tagline that you set for a page or post is used in the big featured image area to help you convey the purpose of the page or post to the visitors. Here’s a step-by-step description of how can you set-up the featured image and tagline to display on a page or post similar to one you see on this page.
Adding a new featured backstretch image on a page or post
- Edit the page or post you wish to set-up the featured backstretch image on.
- Use the WordPress Featured Image metabox to choose or upload the desired featured image.
- Update and refresh the page /post on the front-end to see the new featured image as the backstretch image in the featured image area.
Adding a new tagline to the page / post featured image area
- Edit the page or post you wish to set the custom tagline on.
- Navigate to the Xposure Page / Post Tagline metabox and add the new tagline.
- Update and refresh the page /post on the front-end to see the updated tagline in the featured image area.
Updating the default featured image and tagline for a page or post
- Navigate to Dashboard » Genesis » Xposure Settings » Xposure Default Featured Image
- Change the featured image URL and tagline to the new URL and tagline.
How to create a filterable grid portfolio of the post images
Xposure offers various portfolio styles to help you set-up an elegant showcase of your images. One of the coolest styles is the filterable grid style which allows the visitors to toggle through the images from various categories on your blog and admire your work. You can use the
shortcode to easily create the filterable grid of images with tabs.
How to use the filterable grid shortcode
The shortcode allows you to specify the categories on your blog from which the featured images will be fetched to display the filterable grid on a page / post. Here’s a list of attributes that the shortcode supports:
- catgories (Required): This attribute lets you specify the post categories from which the featured images of the posts should be fetched and displayed to the visitors. Separate multiple categories with a comma(,) to showcase the images from various categories and to create the toggle tabs on the filterable grid.
Default: null - gutter: This attribute lets you specify the horizontal and vertical spacing between the grid elements. Add the integer value for the spacing desired between the elements.
Default: 3
Filterable Grid Portfolio shortcode usage example
[portfolio-isotope categories=“macro,photography” gutter=“0”]
will display the featured images for all the posts categorized under the categories: macro and photography and the gutter between the grid images will be 0.
Output
Notes: The categories attribute is required and accepts the names of post categories on your blog. Multiple categories should be separated by a comma(,) but no spaces between them.
How to set-up a fullscreen slideshow of images on any page
Xposure is fully integrated with Envoke Supersized plugin to help you set-up a full-screen background slideshow of your images on any page. You can use this plugin along with the built-in template to turn any page into a full-screen image slideshow. Here’s a step-by-step description to set-up a full-screen slideshow of images.
- Install and activate the Envoke Supersized plugin.
- Create your own slideshow of images using the plugin.
- Edit the page you wish to set-up the full-screen slider on.
- Navigate to the Template metabox, choose the Xposure Portfolio template and save / update the page.
As you open up the page in the web browser you will be able to see the full-screen slideshow that you had created earlier.
How to set different menus on a page or post with Xposure
Xposure allows you to have custom menus on a per page / post basis. This means if you wish to have a different menu for the menu locations on a page or post, Xposure gives you the ability to do just so.
- Edit the page / post, you wish to set up different menus on.
- Navigate to Xposure Custom Menu Locations and choose the custom menus for the available menu locations.
How to hide or show different elements on a page or post with Xposure
With Xposure, you can turn any page or post into a landing page by enabling or disabling the elements on the page like header, footer, footer-widgets, page-title, etc.
- Edit the page / post you wish to hide / show the page elements on.
- Navigate to Xposure Landing Page Experience metabox and choose the elements you wish to hide.
Customized experience for mobile visitors…
Xposure offers you the ability to hide / show the elements on a page / post separately for users visiting your site on mobile. This means you can offer a completely customized experience to mobile visitors on your site.
How to tweak the site layout, fonts, colors, etc.
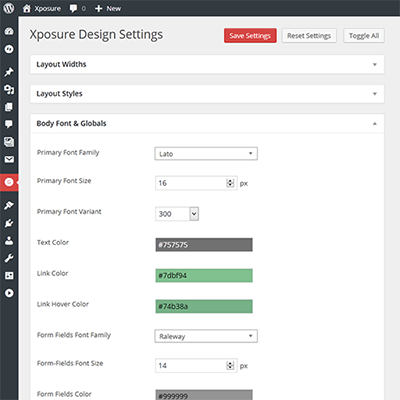
Xposure gives you total control over the site design and typography. The theme offers you an an intelligent options panel to aid you with the site customizations.
- Navigate to Dashboard » Genesis » Xposure Design.
- Configure the options to your liking and save to see the customized design on the front-end.


You must be logged in to post a comment.